Tuesday, May 31, 2011

Perfect for Breakfast (or anytime) - Yoghurt Bread


I have been thinking of making this bread for a long time and, truthfully, never quite around to it. There was always some other bread, just as good that came first. Also, since it includes a 'milky' ingredient, this is obviously not a bread that can sit around overnight. Basically, it is easy to make, but is very impressive on your table. The final result is very tasty, of course, but also just a little tangy (the yoghurt) and perfect when surrounded by all kinds of sweet and slightly sour spreads. Think luscious jams and jellies, or maybe a slightly sour orange marmalade. You might try to slice this bread thinly, to make it last... no matter it will go quickly.

Here's What You'll Need:
4 to 4 1/2 cups AP flour
1 1/2 tsp. salt
1 Tbs. sugar
2 tsp. dry yeast
1 container (200g, 6 1/2 oz) plain yoghurt
3/4 to 1 cup warm water

Here's What You'll Need to Do:
1. Place the flour in a large bowl along with the sugar, salt, and the dry yeast. Mix thoroughly with a wooden spoon.

2. Make a well and add the yoghurt and 3/4 cups of the water. Mix thoroughly to form a rough dough. If the mixture is too dry and does not become a true dough add the remaining water, a little at a time until it comes together.

3. Knead the dough vigorously for about 10 minutes until it becomes smooth. Place the dough in a lightly oiled bowl, turn to coat, then cover and let it rise until doubled in volume. This will take about 2 hours at normal room temperature.

4. Move the risen dough to a baking sheet covered with baking paper. Press it down slightly into a round, then make a hole in the middle using your fingers.

Increase the size of the hole being careful not to deflate the dough. Finally, cover it and let it rise again, this time about 45 minutes.

5. About 20 minutes before baking, pre-heat the oven to 450F (about 220C). Spray the walls of the oven with water, and place boiling water in a tray, just before placing the dough, still on the tray, into the oven. If you have a baking stone, place the tray directly on the stone.

6. Bake for about 30 to 35 minutes or until it is nicely browned and sounds hollow when tapped on the bottom. Cool completely on a rack. Serve with butter, jam or just about anything... this is truly delicious bread!


Saturday, May 21, 2011

New Territory - Apple Bread (World Class)


I have debated doing this for quite a while. It seems I am a stickler for exact definitions something I understand has something to do with being a Virgo. Honestly, I don't know. I will admit to having serious reservations about it all. But one thing is true... I do like things to fit exactly into their little niche, whatever that may be. And that's the problem. In baking there are crossovers and even overlaps. It's never quite that simple.

So for instance, is a good brioche really bread or is it so rich that it's really a cake after all. There is a legend that Marie Antoinette actually said 'Let them eat brioche', not cake only making matters worse for her and us. And what about 'breads like English Muffins? Are they breads after all? I don't know.

The whole category of quick breads falls in this limbo-like state... where to put them??? I personally call them breads (not cake) because of a few reasons: 1) they are eaten usually at breakfast or 'tea' slathered in butter, like bread. And 2) they have a much greater ratio of flour to sugar than a typical cake. But that's being technical. Truthfully, the line is not clear.

And so today's offering... apple bread. The original recipe comes from the incredible website for King Arthur's Flour, where it appears as the world's best banana bread. I have converted this recipe into apple bread, substituting apples for bananas, and cinnamon for vanilla. The result, scrumptious. Try it for yourself, you'll agree!

Here's What You'll Need:

1/2 cup (8 tablespoons) butter
1/2 cup brown sugar, light or dark, firmly packed
1 teaspoon cinnamon
3/4 teaspoon baking soda
1/2 teaspoon salt
1 medium apple plus about 1 cup apple sauce; about 1 pound
1/4 cup honey
2 large eggs
2 cups  Whole Wheat Flour or 100% white whole wheat flour
1/2 cup chopped walnuts

Here's What You'll Need To Do:

1) Preheat your oven to 350°F. Lightly grease an 8 1/2" x 4 1/2" or 9" x 5" loaf pan. (23cm X 13cm)
2) In a large bowl, beat together the butter and sugar until smooth. Add the cinnamon, baking soda, salt, and apples and applesauce, beating until well combined. The mixture will be fairly smooth, with some scattered small chunks of apple.

3) Beat in the honey and eggs.
4) Add the flour, then the walnuts, stirring until smooth.
5) Spoon the batter into the prepared pan, smoothing the top. Let it rest at room temperature for 10 minutes.

6) Bake the bread for 50 minutes, then gently lay a piece of aluminum foil across the top, to prevent over-browning. Bake for an additional 10 to 15 minutes, then remove the bread from the oven; a long toothpick or cake tester inserted into the center should come out clean.
7) Allow the loaf to cool for 10 minutes; then remove it from the pan, and set it on a rack to cool completely.

As I said earlier, this is bread because of the way you eat it. Slice it nice and thick for breakfast and you're good for the whole day!
Yum!


Sunday, May 15, 2011

A Year Later - I'm a Baker!


When I started this enterprise with real seriousness, a year ago, I was still working as an lecturer in Computer Graphics and Basic Animation. It seems like a hundred years ago... or a thousand. In that time, if you've been following, you will know that I studied in a baking course, finished the course and have left my work at the college. Finally, I believe I am ready to make the change to this new career I have chosen. I can proclaim with some amount of pride, really, that I have become a baker!! It's really quite exciting... and not a little nerve-wracking. But also lots of fun.

For instance, I have spent the last few weeks collecting and buying baking equipment, comparing prices and contacting suppliers. This Friday it all starts.. I will be trying to sell my bread (challahs, sweet potato and rosemary loaves, sun-dried tomatoes, garlic and dill) at a local farmer's market. So today, after buying all the materials and ingredients, I spent my time baking the loaves in various shapes and weights to be able to decide what exactly I will sell. The next few posts will therefore be the breads I am preparing for the market. This first one, in loaf form and as a round, is the sweet potato and rosemary bread.

It was absolutely delicious... now let's hope it sells.

Here's What You'll Need: (for 3 loaves)
for the starter
200g AP flour
200ml warm water
5g dry yeast

for the dough
1 1/2 cup (250ml) warm water
1 Tbs. dry yeast
about 800g AP flour (to make a full kilo or 1000g - 200g from the starter)
1 1/5 Tbs. salt
1/4 cup (60ml) good quality olive oil
2 medium sweet potatoes cut in cubes and roasted in olive oil
1 Tbs. chopped fresh rosemary
all of the starter

Here's What You'll Need to Do:
1. Mix the starter, then let it sit at room temperature, covered with plastic wrap for up to 3 hours. To intensify the wheaty flavor, you can place it in the refrigerator overnight. If you do, remove it an hour before you need it tomorrow so it comes back to room temperature.
2. Cut the sweet potatoes into largish cubes, coat with some oil, add some chopped rosemary then roast until soft, about 20 minutes. Afterwards, when it cools, mash them along with the rosemary.
3. Mix all the other ingredients together in a mixer to make a smooth fairly stiff dough. Knead the dough for 10 minutes on medium speed.
4. Finally, add the sweet potato-rosemary mixture and continue kneading until the dough is colored slightly orange. The dough will now be slightly sticky and the sweet potato will not be completely incorporated but will still appear in small pieces here and there.
5. Place in a slightly oiled bowl, turn to coat, then cover with plastic wrap. Let it rise until doubled. This will take about 2 hours.
6. Divide the dough into thirds, shape each into a loaf, then place each 'loaf' into an oiled loaf pan (4X9X2 in) or (10X23X5 cm). If you like, you can shape the dough into a round loaf, like I did.


7. Let the dough rest and rise again, this time until it rises about 2-3cm about the lip of the pan. This will take about an hour.

8. Preheat the oven to 180C (350F). If baking a round loaf, place a baking stone on the floor of the oven. About 5 minutes before baking spray water into the oven.
9. Place the round loaf on the baking stone (if on a tray then place it with the tray directly on the stone).
10. Bake the round loaf for about 30 minutes and the loaves in the pans for about 20 minutes. Yum!!!

Sunday, May 1, 2011

Herbed Italian-style Sandwich Bread


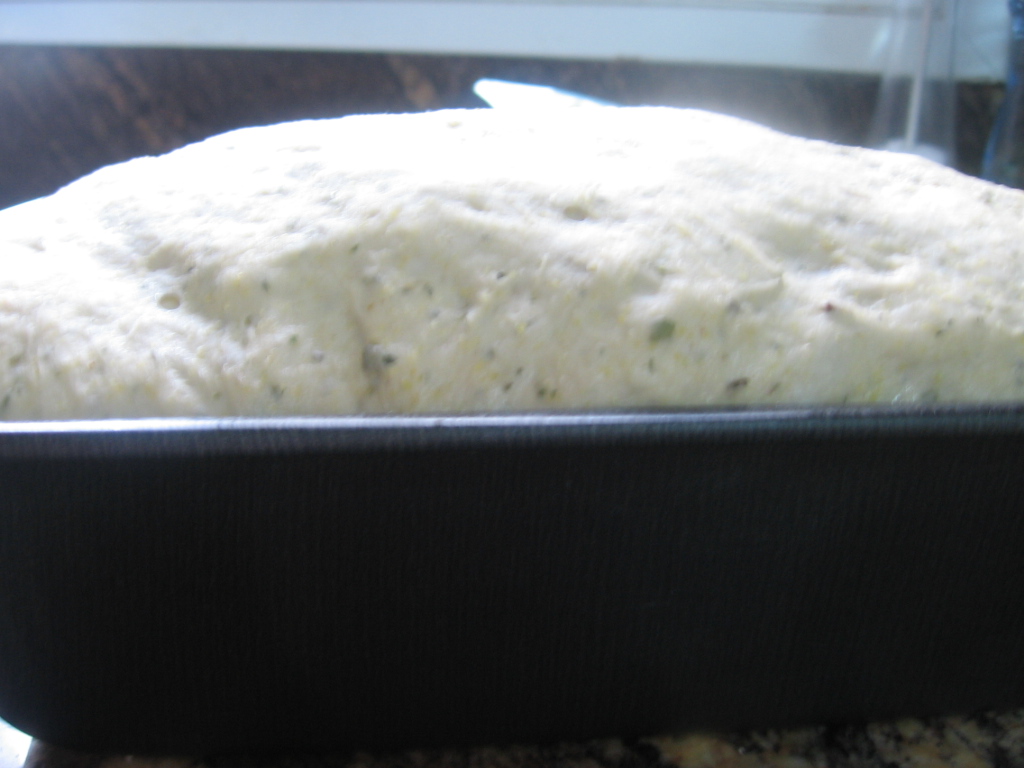
To tell the truth, this is not true Italian bread. It's Italian-style bread, and by that I mean I have loaded itup with herbs and spices like oregano, basil and garlic. Nothing says Italian more than that. And lately I have been trying to create the perfect sandwich bread for specific occasions... soft, sweet breads for breakfast, for instance. And thick-crusted heavy rye breads for smoked meats. This bread has a soft crumb and a semi-chewy crust. Not the almost leathery crust of some East European breads. Not the soft almost spongy breads of the Southern US.

Many months ago I reminisced about the local bakery in the small town where I grew up in Nova Scotia. Bernie's Bakery was a small family business run and owned by a Polish immigrant who could bake bread like  nobody's business. Well, it was his business, but you know what I mean. He made good Polish rye bread. And bagels and bialys. He made cinnamon rolls and he made Italian-style sandwich bread like this one I am posting here.

This bread is a tribute to Bernie's Bakery, long gone but not at all forgotten. The bread is delicious and perfect for savory sandwiches. Smoked meats and pickles. Sharp cheeses and hot peppers. Not cream cheese and jam. For that there are other breads, not this one.

Here's What You'll Need:
1 1/3 cups warm water
2 \tbs. honey
1 Tbs. dry yeast
about 3 1/2 -4 cups AP flour
3 Tbs. butter or margarine (melted)
1 1/2 tsp.salt
2 Tbs. dry milk powder
1 tsp. each dried basil, oregano and garlic

Here's What You'll Need To Do:
1. Stir the honey into the warm water to dissolve. Then sprinkle the yeast over the water and honey and stir in. Let this mixture stand for about 10 minutes to get good and bubbly.

2. Pour the yeast mixture into a large bowl and stir 1 cup of the flour  into it vigorously to create a smooth slurry.

3. Add the melted margarine, the spices and milk powder and finally the salt. Mix to combine fully.


4. Add the remaining flour, 1 cup at a time, until you have a shaggy but homogeneous dough. The dough will be only a little sticky.

5. Knead the dough for about 10  minutes until completely smooth and soft. You may need to add small amounts of flour to keep the dough from becoming too sticky to handle, but try not to add too much that it becomes dry. This is what makes for heavy bread.

6. Place the dough in a lightly oiled bowl, toss to coat, then cover and let it rise for about 1 1/2 hours until doubled in volume.

7. Form the dough into a loaf, being careful not to remove too much 'air', and place in a loaf pan. Cover and let the dough until it come about 1 in (2.5 cm) over the edge of the pan.

8. Bake the bread for about 35 to 40  minutes in a preheated oven at 350 F (175 C).

9. Cool on a rack.

Sunday, April 17, 2011

My Italian Roots (not!!) - Oreganato


There are, of course many variations of the perfect sandwich loaf. Probably every bread-baking culture has its version. And probably a lot depends on the kind of sandwiches the people of the culture like to eat. So, for instance, Jewish sandwich bread, at least those breads from Eastern Europe, tend to be heavy on the rye flour, sometimes with caraway and always smothered with something like corned beef and onions. In France the perfect sandwich bread is a baguette-like roll called 'pain ordinaire', or ordinary bread. This is no ordinary bread, however. It is typically loaded up with a good hard, sharp cheese and washed down with strong coffee. 

This bread is Italian in origin, at least from its herb content, but the style is definitely French. A hybrid of sorts. The original contained some coarsely ground black pepper, which I have omitted since I know my customers. Personally I like food with a little heat, but my house mates.... not so much. Anyway, this bread, because of the added herbs and spices is great for sharp cheeses, or pickled or cured meats (cold cuts, corned beef, sausage) and even crispy veggies. Or a combination. It has a fairly close crumb, which could be more open if you leave to rise a little longer. The crust is only a little chewy. But I actually like it the way it is, since the density helps hold the contents of the sandwich. Enjoy!!

Here's What You'll Need:
4 cups AP flour
3/8 cup uncooked corn meal (coarse - polenta)
2 tsp. granulated garlic
3 tsp. dried parsley
3 tsp. dried oregano
3/4 Tbs. yeast
2 tsp. salt
about 1 1/2 cups warm water

Here's What You'll Need To Do:
1. Mix all the dry ingredients, including the herbs and the yeast together and mix thoroughly.

2. Add the water mixing as you pour it to form a rough dough.

3. Knead this mixture on a lightly-floured tabletop for about 10 minutes until it becomes quite smooth. It will be a little tacky, but smooth, and not at all sticky. Adjust the flour and/or water as needed to get the right texture.

4. Place the kneaded dough into a lightly-oiled bowl, turn to coat, then cover and let it rise in a warm place until doubled. This will take 1 1/2 to 2 hours. You may stretch and fold the dough halfway through if desired to develop the gluten more fully.

5. Form into a loaf shape and place into a prepared loaf pan. Let the dough rise again until it is about 1 inch (2 1/2 cm) above the lip of the pan.

6. Bake in a preheated oven at 350 F (175 C) for about 45 minutes. In a convection oven, bake at 300 F (150 C).

6. Cool on a rack.

Sunday, April 10, 2011

Sentimental Journey with Butter-Dipped Cloverleaf Dinner Rolls


When I was a kid growing up in Nova Scotia, there not too many opportunities to dine out at a restaurant. My town was both small and quite poor so even the fanciest places were not much more than classy diners. At the time, of course, my siblings and I absolutely loved going out to dinner. One of my fondest early memories is at a local restaurant eating, of all things, fish and chips. Believe me, fish and chips are very big in Nova Scotia. The best part, and what made the dinner special, were the rolls. Dinner rolls, I was told, somehow made the whole thing more civilized and 'upscale'. We had bread at home, of course. And challah for Shabbat, but dinner rolls moved us into the realm of the extraordinary.

Many years later, I still remember those dinner rolls very fondly because they are a central element in a very fond childhood memory. These rolls are easy to make, and very delicious. They have a slightly chewy crust and a soft crumb. Perfect for fish and chips.

Here's What You'll Need:
for the starter:
170g (1 cup + 3 Tbs.) AP flour
202ml (3/4 cup + 2Tbs.) warm water
22g (1 Tbs. + 1/2tsp.) honey
1/4 tsp. yeast

for the dough:
156g  (1 cup + 1 1/2 Tbs.) AP flour
20g (2 Tbs. dry milk)
1/2 tsp. yeast
64g 4 1/2 Tbs.) softened butter or margarine
1 1/8 tsp. salt
56g (4 Tbs. softened butter or margarine) for dipping or glazing

Here's What You'll Need to Do:
1. Mix together the starter ingredients whisking them for about 2 minutes to incorporate air.
2. In a separate bowl, mix the flour, dry milk and yeast evenly then spread it evenly over the surface of the starter like a blanket. Cover with plastic wrap and let it ferment at room temperature for at least an hour (as much as 4 hours). If the starter bubbles up through the cracks in the flour 'blanket', that's OK.

3. Add the softened butter or margarine and mix to form a rough dough. Then sprinkle the salt over it all and knead for about 10 minutes to form a smooth but slightly sticky dough.

4. Place the smooth dough ball in a lightly oiled bowl, turn to coat, then cover with plastic wrap to rise in a warm place. This will take as much as 2 hours.
5. Divide the dough into 18 pieces about 30g (1oz.) each and roll into a ball. Place three of these balls into a cup of a greased muffin tin. The 18 pieces will make 6 cloverleaf rolls.

6. Cover and let the rolls rise about 45 minutes. About 15 minutes before baking time pre-heat the oven to 350F (175C).
7. Bake the rolls for about 17 to 20 minutes or until nicely browned. Brush with melted butter or margarine while still hot from the oven. Cool on a rack.

Sunday, April 3, 2011

Not Only for Halloween - Sweet Potato Bread


In North America, sweet potatoes or yams are traditionally harvested and eaten in the fall of the year.  Sweet potatoes are root vegetables and, although they look very much like regular potatoes, have certain qualities that make them ideal for bread. They are sweet of course, hence the name. More importantly, they are orange in color something that adds a wonderful, delicate shade to the bread.

They are to be found everywhere in the world in many shapes and sizes. In Israel we have a member of this family, locally called batata, (stress on the second syllable) an Arabic word for potato.  It is both similar in texture and bright orange just like the North American sweet potato. It can be used interchangeably for all recipes that call for sweet potato. I have even used it to make a great sweet potato pie and candied yams.

This bread is a soft, delicate sandwich bread that is a gentle orange color. It is not the screechy, bright orange of Halloween, but rather it takes on a subdued, understated hue. It is perfect for sandwiches that have drier contents (meat and/or cheese) but probably would not be appropriate for wetter ingredients (like sauces and gravies). Mostly, it's delicious and perfect for breakfast. Makes great toast, too, and tastes great with butter or jam.

Here's What You'll Need:
for the starter (poolish):
200g (1 3/8 cup) AP flour
200g (3/4 cup + 1 1/5 Tbs) warm water
1 tsp. yeast

for the dough:
400g poolish
1 cup (250ml) warm water
10g yeast (2 tsp.)
800g (about 3 1/2 cups) AP flour
1 1/2 tsp. salt
1/4 cup olive oil
2 sweet potatoes, baked until soft and mashed
1 Tbs. coarsely chopped rosemary

Here's What You'll Need to Do:
1. Make the poolish by  mixing the ingredients together. Let it sit, covered, at room temperature for about 3 hours. Place in the refrigerator overnight.

2. Peel and mash the baked sweet potatoes. You can bake them with the rosemary if you wish to intensify the flavor.
3. Knead together all the ingredients, including the poolish to make a slightly sticky dough. Knead it until it is smooth, then form it into a ball
 and place the dough in an oiled bowl, covered, to rise. Let the dough rise until doubled, in a warm place. This will take about 1 1/2 to 2 hours.
4. De-gas the dough as little as possible when handling. Form the dough into 2 round loaves, or torpedo shape or even rolls. Cover with a towel for a final rise, about 45 minutes.

5. Bake at 350F (175C) for about 40 minutes for loaves, or about 20 minutes for rolls. Cool on a rack.