Sunday, April 17, 2011

My Italian Roots (not!!) - Oreganato


There are, of course many variations of the perfect sandwich loaf. Probably every bread-baking culture has its version. And probably a lot depends on the kind of sandwiches the people of the culture like to eat. So, for instance, Jewish sandwich bread, at least those breads from Eastern Europe, tend to be heavy on the rye flour, sometimes with caraway and always smothered with something like corned beef and onions. In France the perfect sandwich bread is a baguette-like roll called 'pain ordinaire', or ordinary bread. This is no ordinary bread, however. It is typically loaded up with a good hard, sharp cheese and washed down with strong coffee. 

This bread is Italian in origin, at least from its herb content, but the style is definitely French. A hybrid of sorts. The original contained some coarsely ground black pepper, which I have omitted since I know my customers. Personally I like food with a little heat, but my house mates.... not so much. Anyway, this bread, because of the added herbs and spices is great for sharp cheeses, or pickled or cured meats (cold cuts, corned beef, sausage) and even crispy veggies. Or a combination. It has a fairly close crumb, which could be more open if you leave to rise a little longer. The crust is only a little chewy. But I actually like it the way it is, since the density helps hold the contents of the sandwich. Enjoy!!

Here's What You'll Need:
4 cups AP flour
3/8 cup uncooked corn meal (coarse - polenta)
2 tsp. granulated garlic
3 tsp. dried parsley
3 tsp. dried oregano
3/4 Tbs. yeast
2 tsp. salt
about 1 1/2 cups warm water

Here's What You'll Need To Do:
1. Mix all the dry ingredients, including the herbs and the yeast together and mix thoroughly.

2. Add the water mixing as you pour it to form a rough dough.

3. Knead this mixture on a lightly-floured tabletop for about 10 minutes until it becomes quite smooth. It will be a little tacky, but smooth, and not at all sticky. Adjust the flour and/or water as needed to get the right texture.

4. Place the kneaded dough into a lightly-oiled bowl, turn to coat, then cover and let it rise in a warm place until doubled. This will take 1 1/2 to 2 hours. You may stretch and fold the dough halfway through if desired to develop the gluten more fully.

5. Form into a loaf shape and place into a prepared loaf pan. Let the dough rise again until it is about 1 inch (2 1/2 cm) above the lip of the pan.
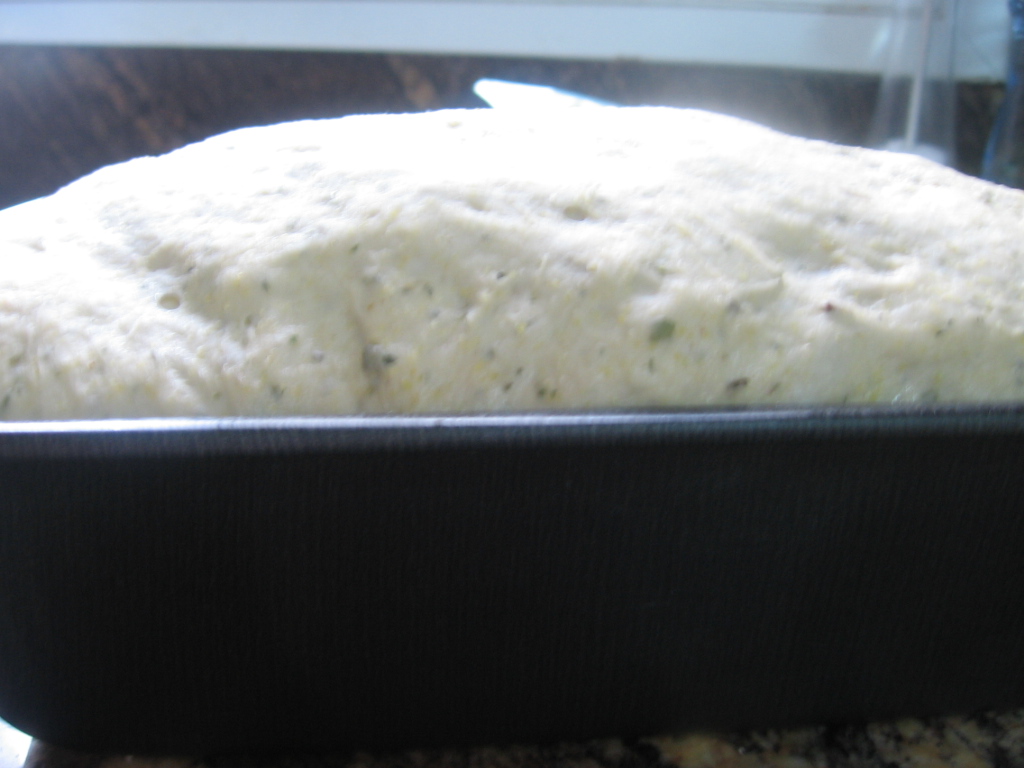
6. Bake in a preheated oven at 350 F (175 C) for about 45 minutes. In a convection oven, bake at 300 F (150 C).

6. Cool on a rack.

Sunday, April 10, 2011

Sentimental Journey with Butter-Dipped Cloverleaf Dinner Rolls


When I was a kid growing up in Nova Scotia, there not too many opportunities to dine out at a restaurant. My town was both small and quite poor so even the fanciest places were not much more than classy diners. At the time, of course, my siblings and I absolutely loved going out to dinner. One of my fondest early memories is at a local restaurant eating, of all things, fish and chips. Believe me, fish and chips are very big in Nova Scotia. The best part, and what made the dinner special, were the rolls. Dinner rolls, I was told, somehow made the whole thing more civilized and 'upscale'. We had bread at home, of course. And challah for Shabbat, but dinner rolls moved us into the realm of the extraordinary.

Many years later, I still remember those dinner rolls very fondly because they are a central element in a very fond childhood memory. These rolls are easy to make, and very delicious. They have a slightly chewy crust and a soft crumb. Perfect for fish and chips.

Here's What You'll Need:
for the starter:
170g (1 cup + 3 Tbs.) AP flour
202ml (3/4 cup + 2Tbs.) warm water
22g (1 Tbs. + 1/2tsp.) honey
1/4 tsp. yeast

for the dough:
156g  (1 cup + 1 1/2 Tbs.) AP flour
20g (2 Tbs. dry milk)
1/2 tsp. yeast
64g 4 1/2 Tbs.) softened butter or margarine
1 1/8 tsp. salt
56g (4 Tbs. softened butter or margarine) for dipping or glazing

Here's What You'll Need to Do:
1. Mix together the starter ingredients whisking them for about 2 minutes to incorporate air.
2. In a separate bowl, mix the flour, dry milk and yeast evenly then spread it evenly over the surface of the starter like a blanket. Cover with plastic wrap and let it ferment at room temperature for at least an hour (as much as 4 hours). If the starter bubbles up through the cracks in the flour 'blanket', that's OK.

3. Add the softened butter or margarine and mix to form a rough dough. Then sprinkle the salt over it all and knead for about 10 minutes to form a smooth but slightly sticky dough.

4. Place the smooth dough ball in a lightly oiled bowl, turn to coat, then cover with plastic wrap to rise in a warm place. This will take as much as 2 hours.
5. Divide the dough into 18 pieces about 30g (1oz.) each and roll into a ball. Place three of these balls into a cup of a greased muffin tin. The 18 pieces will make 6 cloverleaf rolls.

6. Cover and let the rolls rise about 45 minutes. About 15 minutes before baking time pre-heat the oven to 350F (175C).
7. Bake the rolls for about 17 to 20 minutes or until nicely browned. Brush with melted butter or margarine while still hot from the oven. Cool on a rack.

Sunday, April 3, 2011

Not Only for Halloween - Sweet Potato Bread


In North America, sweet potatoes or yams are traditionally harvested and eaten in the fall of the year.  Sweet potatoes are root vegetables and, although they look very much like regular potatoes, have certain qualities that make them ideal for bread. They are sweet of course, hence the name. More importantly, they are orange in color something that adds a wonderful, delicate shade to the bread.

They are to be found everywhere in the world in many shapes and sizes. In Israel we have a member of this family, locally called batata, (stress on the second syllable) an Arabic word for potato.  It is both similar in texture and bright orange just like the North American sweet potato. It can be used interchangeably for all recipes that call for sweet potato. I have even used it to make a great sweet potato pie and candied yams.

This bread is a soft, delicate sandwich bread that is a gentle orange color. It is not the screechy, bright orange of Halloween, but rather it takes on a subdued, understated hue. It is perfect for sandwiches that have drier contents (meat and/or cheese) but probably would not be appropriate for wetter ingredients (like sauces and gravies). Mostly, it's delicious and perfect for breakfast. Makes great toast, too, and tastes great with butter or jam.

Here's What You'll Need:
for the starter (poolish):
200g (1 3/8 cup) AP flour
200g (3/4 cup + 1 1/5 Tbs) warm water
1 tsp. yeast

for the dough:
400g poolish
1 cup (250ml) warm water
10g yeast (2 tsp.)
800g (about 3 1/2 cups) AP flour
1 1/2 tsp. salt
1/4 cup olive oil
2 sweet potatoes, baked until soft and mashed
1 Tbs. coarsely chopped rosemary

Here's What You'll Need to Do:
1. Make the poolish by  mixing the ingredients together. Let it sit, covered, at room temperature for about 3 hours. Place in the refrigerator overnight.

2. Peel and mash the baked sweet potatoes. You can bake them with the rosemary if you wish to intensify the flavor.
3. Knead together all the ingredients, including the poolish to make a slightly sticky dough. Knead it until it is smooth, then form it into a ball
 and place the dough in an oiled bowl, covered, to rise. Let the dough rise until doubled, in a warm place. This will take about 1 1/2 to 2 hours.
4. De-gas the dough as little as possible when handling. Form the dough into 2 round loaves, or torpedo shape or even rolls. Cover with a towel for a final rise, about 45 minutes.

5. Bake at 350F (175C) for about 40 minutes for loaves, or about 20 minutes for rolls. Cool on a rack.

Sunday, March 27, 2011

From the Sahara to Your Table - Tunisian Flatbread


I came across this recipe in an old collection I have and was instantly intrigued. I mean, I have made flatbreads before and some of them have even appeared here in this blog. Just do a quick search for pita, or laffa from the Middle East, or Naan from India or tortillas from Mexico.

Flat breads are conceivably the oldest kinds of bread of all. It is likely they are among the oldest of all cooked or baked goods we have anywhere. I can definitely see how nomadic tribes, by a campfire somewhere, took some grains that had been accidentally fermented in rainwater and formed into a pasty-like something, and slapped them on to the side of a stone in the fire. Or maybe they fell into the fire and they were so hungry they ate the 'burned' grains anyway  finding them to be delicious. However it happened, the first breads were not brioche, that's for sure. It is not a coincidence that everywhere in the world the first breads were all flat.

This bread, from Tunisia is no exception. Tunisia is in North Africa and probably 90% of its territory is desert. The natives, outside the cities, are to this day, mostly Beduin nomads. Sheep and camel herders and traders in the desert just like it has always been. This bread, using a combination of regular AP flour and the coarser semolina flour, is typical of breads where ingredients are simple and often scarce. The bread doubles as a scoop, also typical for Middle Eastern bread. Use it to sop up gravy or hummus, the justly famous chickpea dip found everywhere in the Middle East.

Here's What You'll Need:
50g (1/4 cup) semolina flour
250g (1 7/8 cup) AP flour
1 tsp. salt
250ml (1 cup) warm water
125ml (1/2 cup) olive oil
1 egg mixed in water for glaze
sesame seeds for decoration

Here's What You'll Need to Do:


Mix flour, water, salt, olive oil, yeast until dough adheres in a rough ball.  

Let rise for around an hour until double.   Preheat oven to 400 deg F.  (Around 200 deg C)
Divide and shape into two disks on a baking sheet covered with parchment paper.

Brush with egg yolk.   Sprinkle with sesame seeds and za'atar (hyssop).  

Bake for 40 minutes.   (I turned down oven to 300 after 25 minutes.)  

*Another version of this type of bread uses all white flour, milk instead of water, and an egg thrown in, but I wanted to try to preserve as much of the original taste.

Wednesday, March 16, 2011

More Basics - Searching for the Perfect Sandwich Loaf


I like some of the fancier breads as much as anyone, but sometimes what you really want is a simple sandwich bread. Something simple and sturdy but still tasty and substantial enough to hold your peanut butter, or corned beef or crispy veggies. A bread that won't turn soggy with mayo or other condiments and completely disintegrate but still be soft enough to hold onto in one hand. In short, the perfect sandwich bread.

And I think I have found one!!

In truth, I have been tweaking this recipe for a while. I mean, we all eat sandwiches, right? I started by adapting a recipe from The Bread Bible by Rose Levy Berenbaum. Then added a few additional tweaks of my own.

The thinking is this... Time is your friend when baking bread. If you are patient and if you have the time, you can coax incredible flavors and textures out of bread flour. By mixing in a few 'extras', you can make it even tastier. So, in this post, I am actually going to show you two loaves of bread. Both great, but the second is, IMHO, even better because of the tweaking. Either way, you will have an incredible sandwich experience.

Here's What You'll Need:
for the starter:
1 3/4 cups (240g) AP flour
1 1/8 cups warm water
1/8 cup honey
1/2 tsp. yeast

Combine all the starter ingredients, whisking them to incorporate air. The result is a thick batter-like dough. Cover this with plastic wrap and let is sit for at least an hour (more is better) at room temperature. For an incredible bread, after an hour place it in the refrigerator overnight. Just don't forget to remove it an hour or so before using it tomorrow so it comes back to room temperature.

now for the dough:
1 1/2 cups (220g) AP flour
1/8 cup dry milk powder (I sometimes use non-dairy baby formula powder!)
1/2 tsp. yeast
3/8 cup unsalted butter or margarine softened to room temperature
1 1/8 tsp. salt

Mix together the flour, milk powder and yeast. Then pour it over the starter mixture to cover it like a blanket.
Do not mix it in yet! Let it sit, covered for another hour or more. You will see the starter mixture begin to bubble up in cracks in the flour 'blanket'. That is fine. In fact, it's great! After an hour or so (as much as 4 hours if you have the time) add the softened butter or margarine, and the salt. Then mix it all together to make a rough dough. Cover this and let it rest for 20 minutes. Then knead it on a lightly-floured surface for about 10 minutes until you have a smooth but slightly sticky dough. You may need to add a bit of flour to bring it together or spray with a little water to get the right consistency. Place the kneaded dough in a lightly-oiled bowl, covered, to rise until doubled. This will take 1 1/2 to 2 hours.

Finally shape the dough into a loaf shape, trying not to remove too many bubbles.
 Place the shaped dough in a prepared loaf pan,
covered, just until it rises about 1 inch (2 1/2cm) above the rim of the pan.
Bake at 350 F (175 C) for about 40 to 50 minutes until deep brown. Cool on a rack for an hour before slicing!

* You can greatly enhance the wheaty flavor by substituting 1/3 cup whole wheat flour for the regular flour. This will require slight adjustments to the water requirements since whole wheat flour absorbs more water. The difference is amazing for such a small change. Look at these photos of the same bread but with whole wheat added - wow!


Friday, March 11, 2011

Almost Heaven - Challah Stuffed with Ricotta and Chestnuts


I have to admit that I hadn't thought of stuffing challah bread before. Of course, I know about stuffed breads, and have even tried my hand at it a few times. Still... challah is already so rich. It really is a kind of brioche but with less eggs and butter. My challah recipe is famous, at least in the extended family, and so the idea of stuffing it was a bit intimidating. The idea originated with an article I read in Al Hashulchan, an Israeli food monthly I subscribe to. This latest issue is their annual baking special and it features a recipe for stuffed breads.

Now, honestly, I've never baked with chestnuts before so it was a bit of a learning experience. Also, I used homemade cottage cheese using a recipe my cousin Morey Altman taught me a while ago.

This is a recipe for patient people who like a rich bread surrounding an even richer interior. It takes time. Period. But believe me, it is worth the wait. Best eaten warm, it has good keeping qualities. That means you can slice a piece tomorrow and toast it!! Eat it plain (as if this is plain bread) or covered in butter, incredible!

Here's What You'll Need: (for a single loaf)
2 cups AP flour
1/3 cup (about 50g) rye flour
1 egg
1/8 cup (about 30g) demerara sugar
1/2 Tbs. lemon zest
1/2 Tbs. yeast
1 1/4 cup (185ml) warm water
6 Tbs. (about 100g) butter or margarine, softened
a little less than 1/2 Tbs. salt

for the filling:
about 350g (12oz) fresh chestnuts
200g (a little less than 7oz) ricotta cheese

Here's What You'll Need to Do:
1. Mix all the dough ingredients together, then remove to a lightly floured surface and knead vigorously, for 10 to 12 minutes to form a smooth, soft,slightly tacky dough. Place this dough in a lightly-oiled bowl, turn to coat, then cover and let it rise until doubled, about 1 1/2 hours.

2. In the meantime, cut an 'X' in the bottom of each chestnut. Place them in a pot of boiling water and cook over low heat until they peel easily. This could take 45 minutes. Peel the chestnuts then chop coarsely. Chill the chopped nuts until ready to use.

3. Mix the nuts with the other ingredients for the filling.

4. Divide the dough into 3 pieces. Flatten each piece into a rough rectangle. Then place about 1/3 of the filling on each piece, in the middle. Close the dough around the filling, pinch to close the dough then roll to seal the filling inside. Finally, braid the 3 pieces of filled dough into a challah shape.

5. Place the shaped, filled bread into a prepared loaf pan. Cover, and place in a warm place until is rises to just slightly higher than the rim of the pan.

6. Bake for 45 minutes in an oven heated to 350F (180C) or to 300F (150C) in a convection oven. Cool on a rack completely before slicing.

7. Pass the butter!


Tuesday, March 8, 2011

Something New and Old - Oat Bran Sandwich Bread

If you had visited almost any food website a few years ago, even up to about last year, one ingredient would have certainly jumped out at you - oat bran. For years we all knew about wheat bran, that tough outer coating of the wheat 'seed' that protects it. Usually it is filtered away to make white flour. Or when left in place we have 'whole wheat' flour. But oat bran is/was more exotic somehow. And it was touted as being at the forefront for fighting everything from high cholesterol to cancer. Truthfully, oat bran actually does all those things but probably only if eaten in quantity. Like every day. Sadly oat bran has fallen from the public eye and is no longer the 'in' health food but that shouldn't take away from it's good healthy qualities. It just means something else is in fashion at the moment. If you don't have any, you can substitute regular wheat bran instead. This recipe calls for both. But using oat bran along with the wheat variety will make for a lighter bread with more fiber and who knows, maybe it will lower your cholesterol. In any event, this bread is delicious and has great texture and structure. So it is wonderful sliced for sandwiches and very healthy. Eat a slice every day!

Here's What You'll Need:
4 cups AP flour or bread flour
1 cup oat bran
1/4 cup wheat bran
3/8 cup brown sugar
1 Tbs. yeast
3/4 Tbs. salt
1/2 cup buttermilk or soy milk
1 1/4 cups warm water

Here's What You'll Need To Do:
1. Combine all the dry ingredients in a large bowl, including the brown sugar. Add the liquids and stir to combine. Move the ragged dough to a lightly-floured surface and knead for 10 minutes or so to make a smooth dough. As you knead the dough the bran will be more and more incorporated until it almost disappears. I have a confession to make. I own a bread machine, and sometimes, but only sometimes I use it to mix the dough. I never, ever use it to bake bread. I don't like the shape. Or the paddle stuck in the bottom, either. But sometimes, especially when the dough is sticky, it is a nice tool to have on hand for mixing and kneading the dough. As you can see from these photos, I used it for this bread.

2. Place the kneaded dough in a lightly-oiled bowl, turn to coat, then cover and let it rise until doubled, about 1 1/2 hours.

3. Remove the dough from the bowl and form into a loaf. Cover and let it rise again until it just rises over the tops of the loaf pan.

4. Bake at 350F (180C), or about 300F (150C in a convection oven) for about 45 minutes until golden brown. Let this bread cool completely on a rack before slicing. Yum!!!